1. Scheduling an SPL transfer
What you will learn
In this guide, you will learn how to schedule an SPL token transfer using Clockwork. This example will demonstrate many key concepts of working with Clockwork:
How the Clockwork program model works.
How to sign transactions with threads.
How to monitor an automation.
All code in this guide is open-source and free to fork on Github.
1. The Clockwork programming model
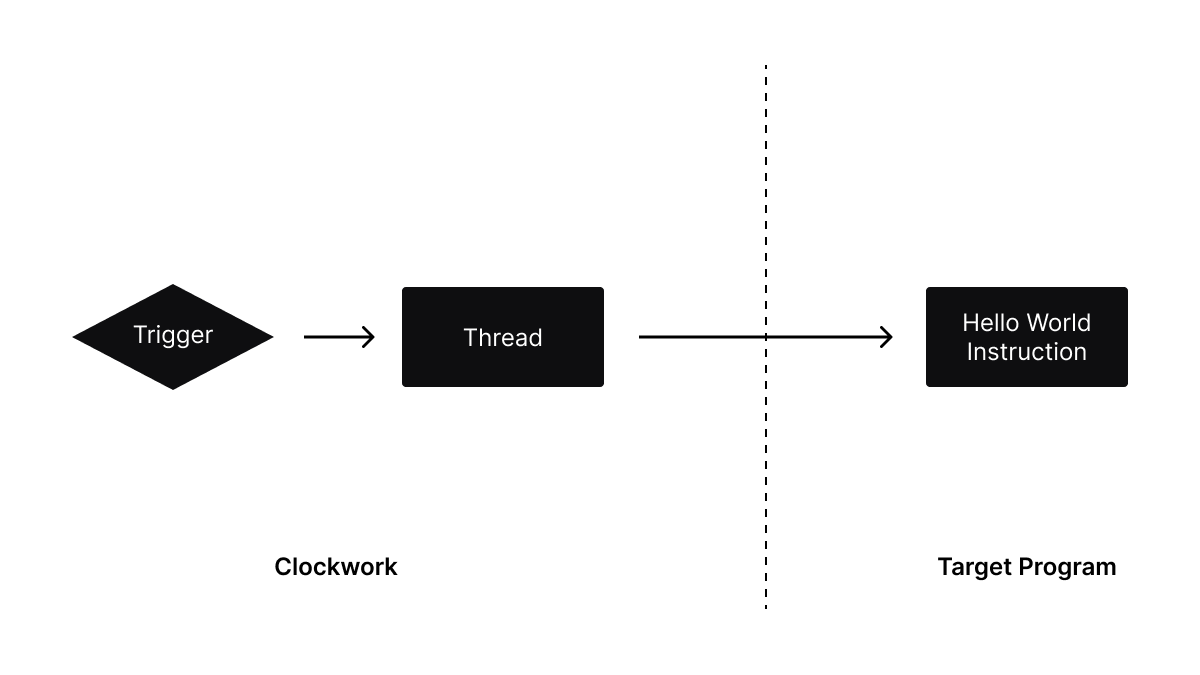
Let's start with the big picture. Solana is a really fast, globally distributed computer. Just as programs on a traditional computer needs to be able to execute an automated series of instructions, so do programs on Solana. Clockwork threads are an automation primitive analogous to computer threads that developers can use to automate programs on Solana. In simple terms, this means we can point Clockwork at any Solana program to automate it. A model of this relationship is presented in the diagram below.

2. Setting up our project
Let's begin by creating a new vanilla Node Typescript project:
Create a new tsconfig.json file:
Create a new package.json file with the below content. The main dependencies you really need in your project are:
@clockwork-xyz/sdkfor interacting with Clockwork.@solana/spl-tokento build token transfer instructions.
Install the dependencies by running:
Now, let's scaffold a simple test in main.ts:
We use your default paper keypair as the payer, this of course will change depending on your use case.
Finally, we initialize a
ClockworkProvider. This will be required later to create your thread.
3. Signing with threads
In this section, we will focus on how signing works with Threads. But first, let's prepare the accounts needed for the SPL Transfer Instruction to be scheduled. If you ever worked with Solana, you might know by now that SPL Transfers don't happen between system accounts, but instead between associated token accounts.
Let's start by creating the associated token account for the recipient account.
In another guide, we will see how to lazily create the recipient ata.
Then, let's start do the same with the source account. I have already prepared a function called fundSource which helps fund our source account with some SPL token. You probably won't need this in a real world scenario.
Let's talk about the elephant in the room, who should be the source account?
When doing a a transfer we need to deduct fund and authorize this debit, thus source should be a signer. This works fine in a traditional scenario, you provide the signer when submitting the transaction and voila!
When working with Threads, we schedule our instructions to be executed by Threads, more precisely by the Clockwork thread program. For this reason, the signer for your automated instruction is actually your thread:
4. Scheduling a SPL token transfer instruction
Now that we have the ingredients in place, we can finally build our SPL token transfer instruction and schedule a thread to run this instruction:
We can see the threadCreate function asks for 5 arguments. These include some basic information needed to initialize the thread account.
authority– The owner of the thread. This account must be the transaction signer and will have permission to delete, pause, resume, stop, and update the thread.id– An identifier for the thread (can also use buffer or vec u8).instructions– The list of instructions to execute when the trigger condition becomes valid.trigger– The trigger condition for the thread. When this condition is valid, the thread will begin executing the provided instructions. You can read more about triggers.amount– The number of lamports to fund the thread account with. Remember to provide a small amount of SOL. Read more about how fees are calculated here.
5. Running the tests
Now we need to get our app running. If you have not done so already, you will need to install the Clockwork CLI by running the cargo command below. If you face any trouble here, please refer to the installation docs.
Now that we have Clockwork installed, we can go ahead and spin up a local Clockwork node:
In a separate terminal window, we'll run the test:
6. Monitoring our automation
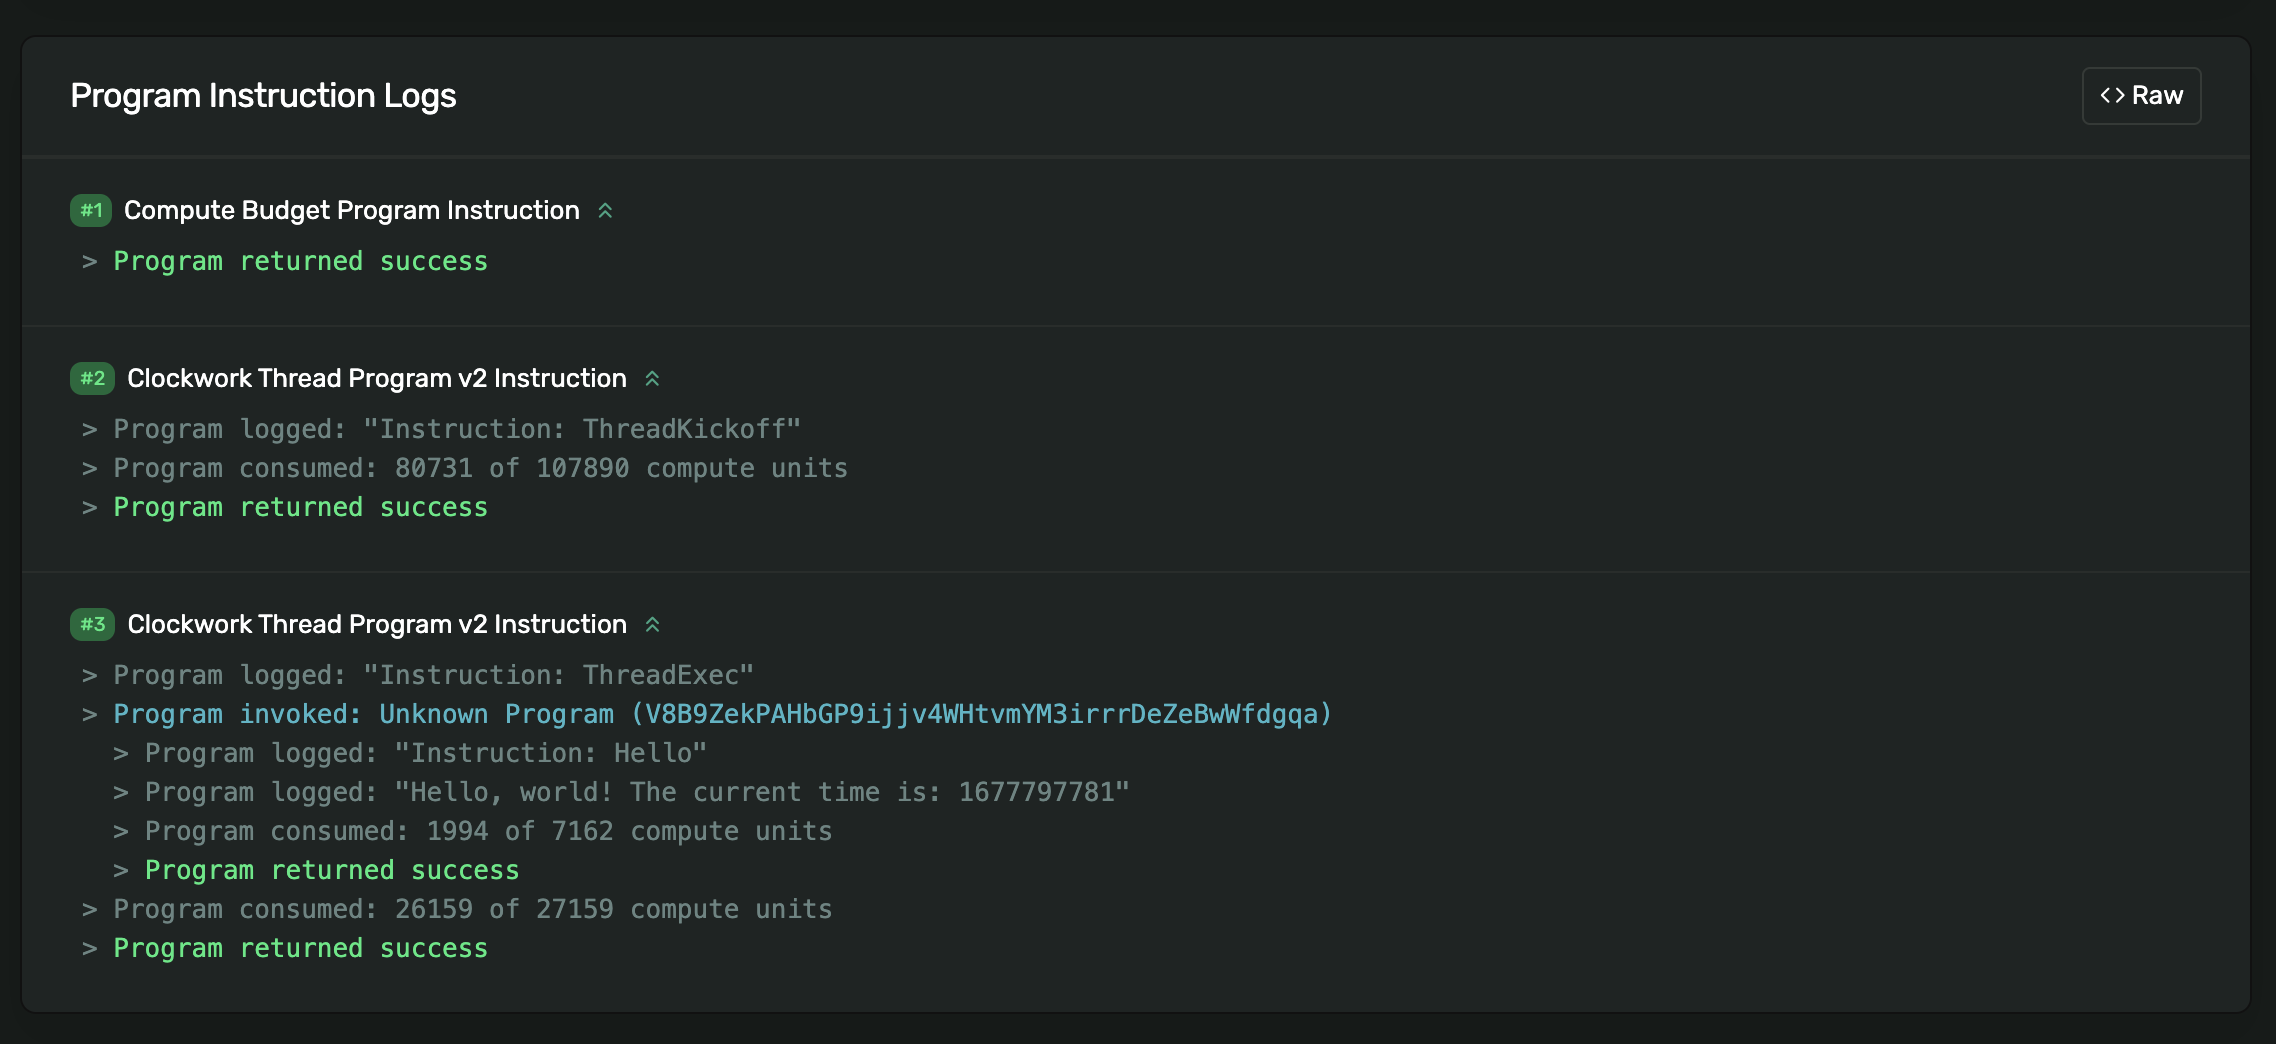
If you setup everything correctly, you can now watch your automated program run all on its own. Grab the Clockwork explorer link that was printed out to the console. Using the Clockwork explorer, you can get simulation logs and inspect if your thread is not running and why. For example, here's mine: https://app.clockwork.xyz/threads/GB7YgYK3bKF8J4Rr9Z2oeA3hwxrJdvW5zgXuNaxWWmUF?cluster=devnet

Of course you can also look up your thread account in your favorite Solana explorer. You can alternatively use the Solana CLI to stream program logs by running the command provided below. Here's an example thread that was created in a test on May 24th, 2023.

Key insights
Threads are an automation primitive for Solana.
You can use threads to automate any program instruction on Solana.
Triggers allow you to define when a thread should begin execution.
Threads must be funded with a small amount of SOL to pay for automation fees.
The signer for your instruction is your thread pda.
Appendix
This guide was written using the following environment dependencies.
Anchor
v0.27.0
Clockwork
v2.0.17
Clockwork TS SDK
v0.3.4
Rust
v1.65.0
Solana
v1.14.16
Ubuntu
v20.04
Continue learning
A complete copy of all code provided in this guide can be found in the examples repo on GitHub.
Ask questions on Discord.
Last updated